Thursday, February 23, 2012

Stopping oil...

While in there to renew my rear brakes I discovered an unwelcome guest - hypoid oil.  One of my rear axle seals had deteriorated and leaked oil into the left brake drum.  Not a good thing for stopping power.  This meant pulling the axle shafts out and replacing the bearing & seals.

As it turned out, this was not a difficult job, but requires a tall hydraulic press like the one used to install the CV joints.

The old bearings looked perfect, but I replaced them just so I don't have to worry for the next 30 years or so.  There's a nut & lock washer that keeps pressure on the bearing.  To remove you have to tap the ears of the lock washer down, and use the special MB tool (or a chisel) to remove the nut.  Then you're ready to use the press to remove the bearing, seal, and end cap all at once.

The rear axle kit consists of a bearing, a seal assembly that has a lip seal, o-ring, and foam dust seal, new self-locking nuts to hold on the bearing cap, and a cap gasket.

Simple enough, and a job that can be done in about an hour per side if you're in a hurry.  I spent about double that to make sure everything was clean and nicely repainted.  One more thing I wont have to worry about in the future.  It's starting to seem like I'm rebuilding the whole truck at this rate!

Gimmie a brake!

As if I haven't bitten off enough with this major servicing, I decided to overhaul the braking system.  I'd previously replaced all of the rubber high-pressure lines, but now was the time to do the rest.

The master cylinder is an easy swap, but like with all of the brake components you need to be very careful when removing the hard hydraulic lines.  Many of mine needed some encouragement from a MAPP gas torch.

If you're doing the master cylinder, you'd better do the rear proportioning valve as well.  It regulates the amount of braking power applied to the rear wheels under different loading and road conditions.

As it turned out, mine was totally inoperative until I replaced it.  Who knew?

Next I rebuilt both front brake calipers.  There is a caliper seal kit to do this, but it does not include the 2 seals that joint the fluid passages between caliper halves.  I could have skipped splitting the halves but am very glad I didn't - they were filthy and starting to corrode inside.  Now they look almost new!


The rear brakes were original to the truck, and very ugly.  All of the hardware was corroded and the automatic adjuster seemed stuck.

After liberal amounts of brake cleaner and a wire brush I was able to make the backing plate and other parts look great.  The adjuster got a dab of PTFE & silicone grease on the adjustment threads, and I bought a new hardware kit so the springs and such would be ready for the future.  Even the parking brake cables got replaced just because the old ones were corroding under their skin, although they did work.


Wheel cylinders were of course replaced at the same time, and boy did they need it.  This thing should stop like new when it's done!

Wednesday, February 1, 2012

Continuous Velocity...

After a meticulous parts order and a lot of money spent, my parts arrived.

First on the agenda was the CV joints.  From what I've heard, and from what the service manual describes, these things may be a bit tough to handle.

As far as removing goes, mine came off like frosting from a cupcake!  Just hold the snap ring open and tap lightly with a hammer - off it goes.  I then did some cleaning and slid the new rubber CV boot in the proper orientation onto the axle and tightly secured its strap.

For curiosity's sake I took the old CV joint apart to see where the wear points are.  As you can see in the photos, the chrome balls wear a groove into the housing and carrier journals.  The importance of regular maintenance with fresh grease and a secure CV boot cannot be over-emphasized.


These joints were loose with rotational play and also play along the axis of the axle.  I never heard any "clicking" like you'd normally expect but under severe load conditions this would certainly be a failure point.

Then I was ready for the new CV.  Um... not so fast.  Yes, I greased the axle splines first, and yes the CV splines too, but I could only get the CV to slide 3/4 of the way onto the axle splines even with the help of a plastic hammer.  I guess I was fooled by the old CVs coming off so easily.  The new ones require some persuasion.  A tall hydraulic press will be necessary here, but if all else fails you can retain the help of a local machine shop.  My press needed some creative setup but did the job.

With the new CVs in place, grease applied (2-packs per joint), and the outer-half of the boots secured with a strap, the axles were ready to re-install.  Not a bad project after all.

Saturday, January 21, 2012

Electrocution

Well, maybe the title's an overstatement, but what a fiasco that alternator conversion is.  Yes, it is a bolt-on larger alternator, but there are a few things to be aware of if you're thinking of doing this mod.

First, the alternator bolt holes need to be drilled out to a little over 10mm to mount on the diesel engine - no big deal.

Next, if you try to mount the alternator onto the engine with the adjuster attached to it, it can't swing past the heater hose/thermostat housing.  Trying to attach that adjuster bracket after the alternator is in is torture, but I eventually did it.  One big obstacle was that the adjuster has a threaded rod welded to one of the mounting bolts - this had to be installed somehow while holding a steel spacer in place with a magnet.

Once in, there isn't enough clearance to swing the alternator in to allow the adjuster nut back onto the threaded rod.  Once everything is bolted in hand-tight you'll find that the clearance issue will show up again when you try to install your belts.  Ideally, they need to be about 10mm longer I think.  Ultimately I was able to get them back on but only with great time and difficulty.

That eBay ad for the 120 amp alternator had me going... it looked like 'unbolt old alternator & bolt in the new one.'  This one is a more reliable 90 amp with the same housing.   I hope it's worth it.

Thursday, January 19, 2012

Electrifying

Since my G is disabled until the parts come from Mike, I'm talking advantage of this time to make other repairs & improvements.

Today is the day for power.  I have plans for a winch and fog lights in the future so I've been trying to figure out the best way to adapt the electrical system of the G to accommodate those added loads.  The 300SD motor I installed came with a 55-amp alternator, which was rebuilt and is ol' reliable, especially at lower RPMs when most high-amp alternators give no output.  I'm just concerned that the system will not be able to keep up with a winch draw of well over 100 amps.

In fact, there seems to be a golden path for alternators, where they balance amp output with low-RPM effectiveness.  For this reason I selected an alternator from a Mercedes 380/420/560 gas engine.  This is a Bosch unit with the same mounting ear dimensions and a 90-amp output.  There is an ebay seller that re-wires these to produce 120A but they were not designed for that kind of load and are likely to burn up prematurely, especially if you're recovering from a winch pull.  In particular, the copper windings were not sized to carry that much amperage.


The conversion requires little more than crimping a loop connector in place of the two-wire plug on the charge wire, and another loop on the idiot-light wire.  Mounting is just like the stock unit and uses the same pulley.

That covers only half of the challenge though.  Even though the original Mercedes battery was pretty hefty, few of us actually use that rather expensive battery today.  Most wheelers will opt for a dual-battery setup, either powering the winch exclusively from the 2nd batt, or using them in unison for added capacity.  Both options require installing an isolator and possibly other control and monitoring equipment.

My conclusion was to go with a battery designed and built for the military: the 6TL.  You can find this thing at any Napa, o'Riley, and probably a great many other locations for about $200.  What's nice about it is that while being a 12V battery, it has an amp-hour (ah) rating of over 100 - a typical diesel battery is around 45.  Other specs are 750 CCA and 850 CA.  Not only do you eliminate the need for the isolation circuitry, but you have more than double the capacity in a battery that was built specifically to handle steep inclines, vibration, and demanding loads.  It's much heftier than a car battery and has double the glass matt thickness on the bottom and special anti-short technology in the internal plates.  They call it maintenance-free but it's equipped with caps so you can check whenever you like.  The last fun bit of trivia is: this is the battery used in tanks!

To make that colossal battery fit, all that appears to be needed is an extended tray.  It would probably be enough to just cut off the lip from the existing tray and figure out a way to strap the battery in, but I'm going a little farther.  I'm making a whole new tray with sturdy clamp and hopefully a side-compartment for storing extra junk (oil, brake fluid, gum).  The 6TL is 11.25x10.5x9 so it will leave plenty of space on one end of the battery for storage.

I also plan to install the military type terminals because they are much easier to add expansions to - such as a dedicated winch power cable or electrical accessories.

This is all just starting but final results will be posted as it goes.

Saturday, January 14, 2012

Axle-Shmacksle

Even before I bought this G I knew there would likely be issues with the front axle.  Some say it's the Achilles-heel of these vehicles but after zero maintenance for 200K miles, I'd call it about time for some service.  Amazingly, I've been driving this heavily worn axle, off-road and on, without any problems.  Still, I knew it needed attention, so today was tear-down day.

Others have made step-by-step tutorials about this service so I won't attempt to do it again.  The following is just a chronicle of my G in progress.

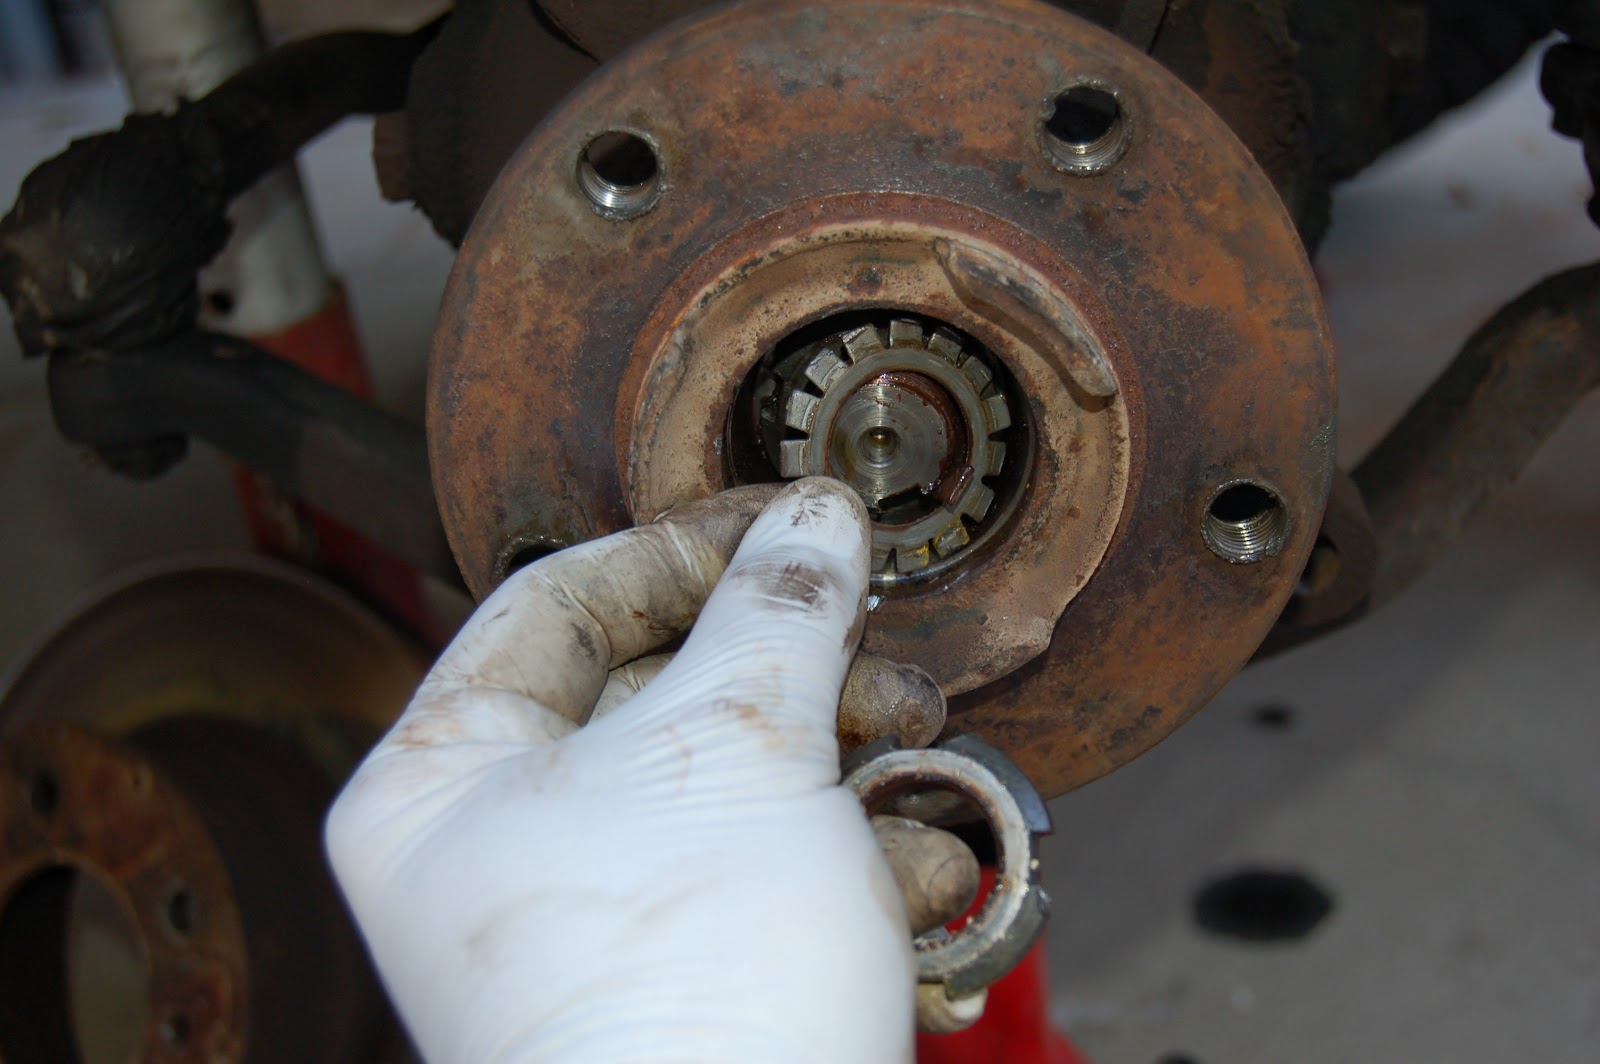
I started by putting the front end on four jack stands - this thing is heavy & I don't want it falling on my head!  Next, the wheel came off and I pulled the axle bearing dust cap to see what's inside.
Next I removed the brake caliper and the two bolts that hold the brake line retainer so I could zip-tie the caliper up and out of the way.
I removed the phillips-head screw that holds the brake rotor onto the hub, but the rotor would not budge.  After some penetrating oil, blow-torching, and some gentle hammer blows the rotor reluctantly came off.
Now I got stuck.  You need a special tool to loosen the axle nut, but I planned to replace these with the newer (W463) style anyway so I just used a chisel and butchered it off.
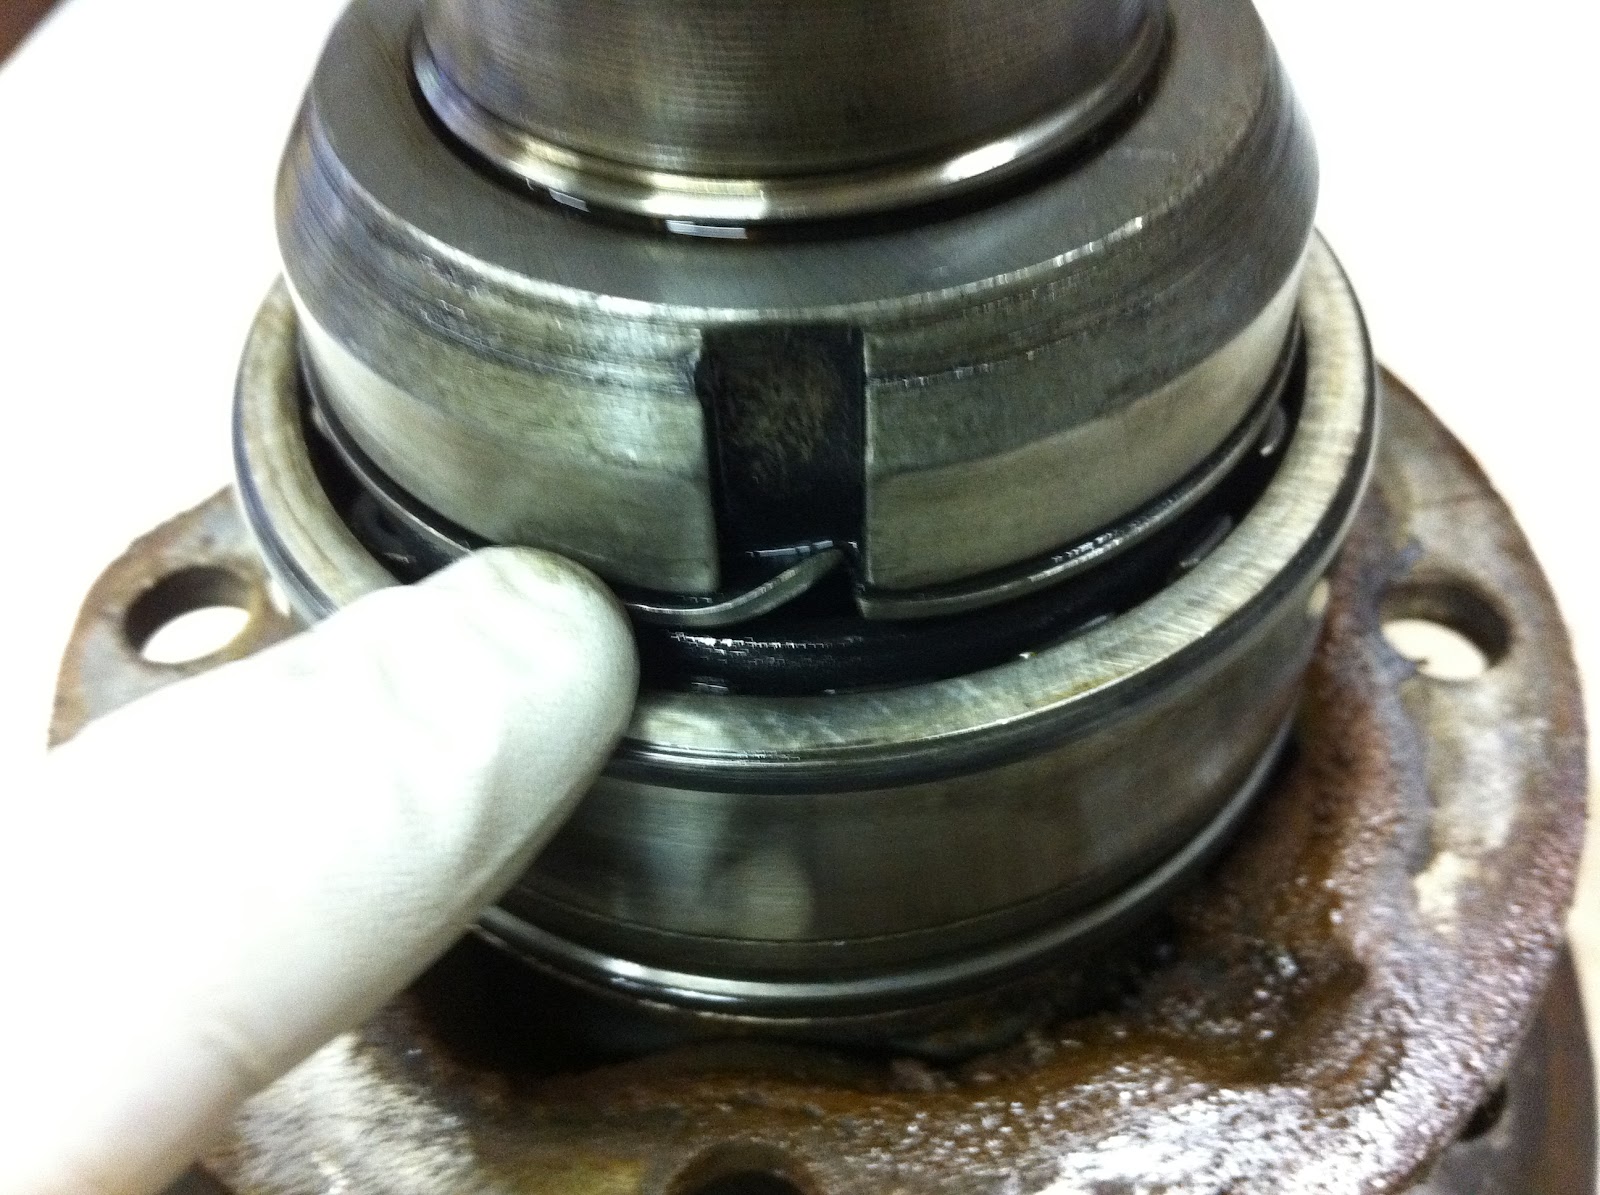
The hub popped out easily once that nut, the locking washer, and the 2nd nut were removed.
Thankfully, no surprises here, although the grease smelled burned and there were streaks of rust throughout.  The grease seal was a bit tough to remove due to it's size but it finally came out a little worse for wear.
To get the steering knuckle off you need to remove one of the swivel bearing pins - the top one already had two bolts removed so I popped that one off more easily, despite them being VERY rusted-stuck.  I then removed the drag link and tie rod.
After rotating the housing down and lifting it out, the messy burned grease mess was exposed.  It took several old t-shirts to wipe off the nasty grease and reach the somewhat cleaned axle housing.
If you look carefully you can see the red-orange colored outer axle tube seal - this is apparently a later style axle because some have that seal at the differential.  The steering knuckle had it's own grease collection, and the pivot bearings were pretty rusty, but they did seem to move freely.
The last part to remove was the CV joint & axle shaft.  To my surprise, this simply pulled straight out with ease.  Then, however, I was stunned to see that there was no rubber boot on my CV!  Where did it go?  In the following photo you can see the metal straps holding the inner and outer lips of the boot... but the boot itself is gone!  I did find a few fragments of it in that greasy mess I'd removed, but wow.  I've never seen a whole boot just disappear like that.  And I've been driving all over the place like that.  Wow.

So... now I have a big list of parts to order, and an even bigger bill to pay.  Fortunately, everything will be back on line and in good shape soon.  I'll be adding a full brake system rebuild while the calipers are off, so this G will be one step closer to the Rubicon this year.