Thursday, February 23, 2012

Stopping oil...

While in there to renew my rear brakes I discovered an unwelcome guest - hypoid oil.  One of my rear axle seals had deteriorated and leaked oil into the left brake drum.  Not a good thing for stopping power.  This meant pulling the axle shafts out and replacing the bearing & seals.

As it turned out, this was not a difficult job, but requires a tall hydraulic press like the one used to install the CV joints.

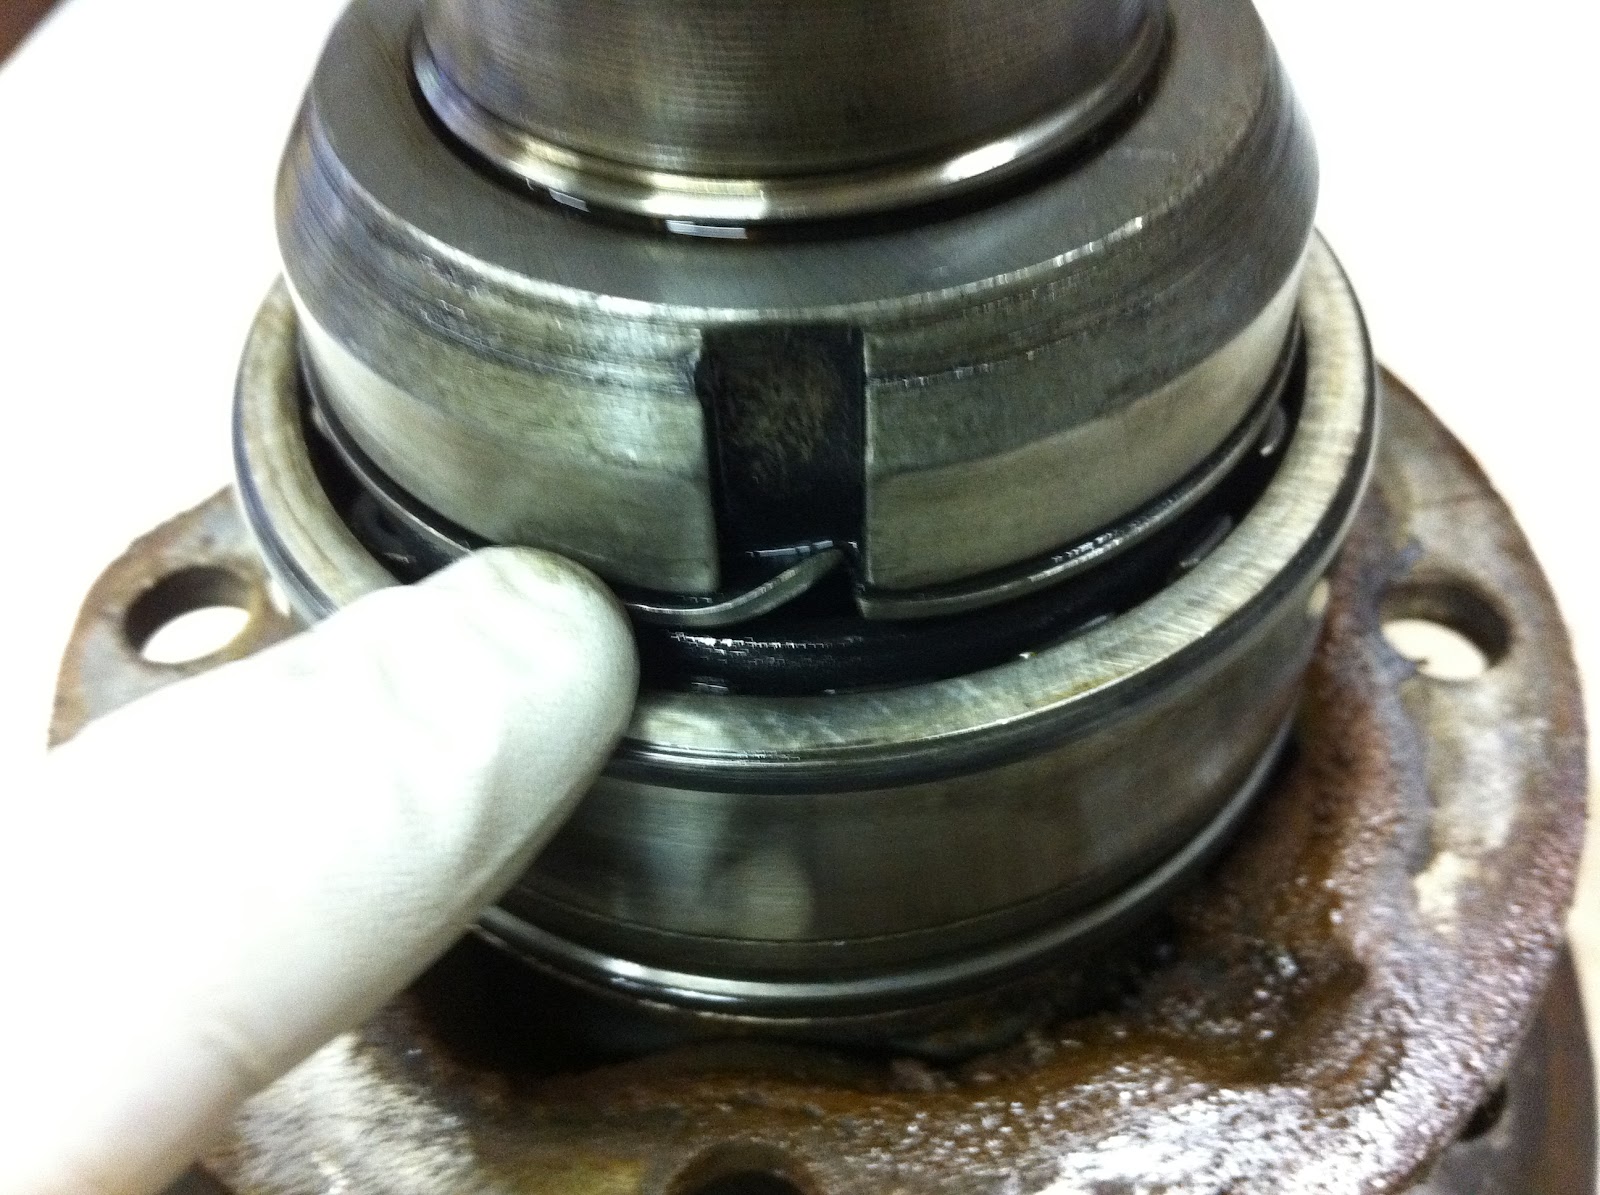
The old bearings looked perfect, but I replaced them just so I don't have to worry for the next 30 years or so.  There's a nut & lock washer that keeps pressure on the bearing.  To remove you have to tap the ears of the lock washer down, and use the special MB tool (or a chisel) to remove the nut.  Then you're ready to use the press to remove the bearing, seal, and end cap all at once.

The rear axle kit consists of a bearing, a seal assembly that has a lip seal, o-ring, and foam dust seal, new self-locking nuts to hold on the bearing cap, and a cap gasket.

Simple enough, and a job that can be done in about an hour per side if you're in a hurry.  I spent about double that to make sure everything was clean and nicely repainted.  One more thing I wont have to worry about in the future.  It's starting to seem like I'm rebuilding the whole truck at this rate!

Gimmie a brake!

As if I haven't bitten off enough with this major servicing, I decided to overhaul the braking system.  I'd previously replaced all of the rubber high-pressure lines, but now was the time to do the rest.

The master cylinder is an easy swap, but like with all of the brake components you need to be very careful when removing the hard hydraulic lines.  Many of mine needed some encouragement from a MAPP gas torch.

If you're doing the master cylinder, you'd better do the rear proportioning valve as well.  It regulates the amount of braking power applied to the rear wheels under different loading and road conditions.

As it turned out, mine was totally inoperative until I replaced it.  Who knew?

Next I rebuilt both front brake calipers.  There is a caliper seal kit to do this, but it does not include the 2 seals that joint the fluid passages between caliper halves.  I could have skipped splitting the halves but am very glad I didn't - they were filthy and starting to corrode inside.  Now they look almost new!


The rear brakes were original to the truck, and very ugly.  All of the hardware was corroded and the automatic adjuster seemed stuck.

After liberal amounts of brake cleaner and a wire brush I was able to make the backing plate and other parts look great.  The adjuster got a dab of PTFE & silicone grease on the adjustment threads, and I bought a new hardware kit so the springs and such would be ready for the future.  Even the parking brake cables got replaced just because the old ones were corroding under their skin, although they did work.


Wheel cylinders were of course replaced at the same time, and boy did they need it.  This thing should stop like new when it's done!

Wednesday, February 1, 2012

Continuous Velocity...

After a meticulous parts order and a lot of money spent, my parts arrived.

First on the agenda was the CV joints.  From what I've heard, and from what the service manual describes, these things may be a bit tough to handle.

As far as removing goes, mine came off like frosting from a cupcake!  Just hold the snap ring open and tap lightly with a hammer - off it goes.  I then did some cleaning and slid the new rubber CV boot in the proper orientation onto the axle and tightly secured its strap.

For curiosity's sake I took the old CV joint apart to see where the wear points are.  As you can see in the photos, the chrome balls wear a groove into the housing and carrier journals.  The importance of regular maintenance with fresh grease and a secure CV boot cannot be over-emphasized.


These joints were loose with rotational play and also play along the axis of the axle.  I never heard any "clicking" like you'd normally expect but under severe load conditions this would certainly be a failure point.

Then I was ready for the new CV.  Um... not so fast.  Yes, I greased the axle splines first, and yes the CV splines too, but I could only get the CV to slide 3/4 of the way onto the axle splines even with the help of a plastic hammer.  I guess I was fooled by the old CVs coming off so easily.  The new ones require some persuasion.  A tall hydraulic press will be necessary here, but if all else fails you can retain the help of a local machine shop.  My press needed some creative setup but did the job.

With the new CVs in place, grease applied (2-packs per joint), and the outer-half of the boots secured with a strap, the axles were ready to re-install.  Not a bad project after all.